Best Beginner Sous Vide Kit

Wondering which sous-vide kit to choose to start without breaking the bank? Frankly, it's a real puzzle between marketing promises and thousands of online reviews. I'll help you make sense of it so you can finally put it into practice and cook your first steaks to perfection, without the headache.
Key Points to Remember
- A good beginner kit rests on three pillars: an accurate cooking probe (±0.5°C), a sealer with a "moist" mode, and heat-resistant bags.
- To start, use your own saucepan; a dedicated container is only useful for very long cooks or very large cuts.
- Choose a sealer compatible with standard rolls of bags for more flexibility and economy.
- Focus your budget on the essentials (immersion circulator and sealer) and avoid unnecessary gadgets like all-in-one kits or complex connected features.
- Success in sous-vide comes from mastering the basics: proper vacuum sealing and strict adherence to time and temperature.
The Basics to Get Started: What's in a Sous Vide Kit?
Don't expect just a machine. A real starter kit is a trio that works as a team. Forget one of these elements, and failure is guaranteed. Here's what you should find in a good starter offer.
The Driving Element: The Cooking Circulator
This is the brain of the operation. This small unit clips onto the edge of your pot or a container, heats the water, and maintains it at the exact temperature you set. The difference between a decent model and an excellent one comes down to two very concrete points.
First, thermal precision. For a beginner, aim for a minimum stability of ±0.5°C. This means that if you set it to 60°C, the water will fluctuate between 59.5 and 60.5°C. That's already very good for most meats and vegetables. Next, the circulation power. A small propeller agitates the water to eliminate cold spots. Low power (say 8W) is enough for a pot, but if you're considering a large 20-liter container for a whole roast, aim for 12W or more. This is the kind of detail that makes the difference between a uniformly cooked chicken and an overcooked part.
The Essential Partner: The Vacuum Sealer
No vacuum sealing, no sous vide cooking. It's as simple as that. For a first kit, you will almost always get an external suction sealer. Concretely, you place the open edge of the bag in the machine, it sucks out the air and then seals the plastic weld. Two functions to absolutely check: a "wet" mode (often a droplet icon) for marinated or juicy foods, and a sealing bar long enough (at least 30 cm) to be able to seal large bags. Frankly, a sealer without a wet mode is almost useless in real cooking.
The Containers: Where Do Your Foods Go?
This is where beginners often go wrong by buying the wrong references. Your kit must include, or you must purchase separately:
- Compatible vacuum bags: They must be suitable for your sealer and heat resistant. Standard freezer bags will melt in the water bath. A good beginner kit includes about ten of various sizes (small for fish fillets, large for a chicken).
- Vacuum containers or boxes (optional but very useful): Perfect for liquids (sauces, soups) or fragile foods (strawberries). You suck out the air via a valve on the lid. It's less efficient than a bag, but terribly practical for everyday use.
How to Choose a Sealer Suitable for Your Foods?

This is often the first real technical choice. And it doesn't boil down to just "a machine that sucks air." The nature of what you cook most should guide your decision. A mistake here, and you'll be frustrated every time you want to vacuum seal tomatoes or a marinade.
External Vacuum vs. Chamber: The Fundamental Choice
For a beginner, we almost always talk about an external vacuum sealer. You insert the edge of the bag into the machine, it sucks the air out through a port and seals. It's simple, compact, and affordable. But beware: its performance depends a lot on the texture of your food.
- For solid and dry foods (a steak, cut vegetables): It's perfect. You'll get a decent vacuum.
- For liquid, very moist, or powdery foods (a soup, strawberries, flour): This is the weak point. Liquid can be sucked into the mechanism and damage it. This is where the famous "moist" mode becomes essential. This program sucks more slowly, allows liquid to settle back into the bag before sealing, and saves your machine. Do not choose a sealer without this function, it's a friend's advice.
The chamber sealer (where the entire bag goes into a drawer) is much more efficient and handles all types of foods. But it is more expensive, bulky, and rare in a beginner's kit. For versatile but non-intensive home use, a good external vacuum sealer with a moist mode is more than sufficient.
Suction Power and Seal Quality: The Numbers to Decipher
There's a lot of talk about power in kPa (kiloPascals). This is the suction force. For home use, aim for between 70 and 90 kPa. Below 70 kPa, the vacuum may be less effective on wide bags or bulky foods. Above 90 kPa is excellent, but often the domain of more expensive models. Don't focus solely on this.
The sealing bar is just as crucial. It should be wide (at least 30 cm) to accommodate large bags. A good seal is thick, uniform, and resists pulling. A bad seal, thin and fragile, compromises the entire preservation. Always test it with a bag filled with light absorbent paper after purchase.
The Proprietary Bag Trap
This is a crucial economic detail. Some brands use bags with a specific seal pattern, forcing you to use only their bags, which are often more expensive. For your best beginner vacuum sealing kit, prioritize a machine compatible with standard smooth bags. You will then be able to buy much cheaper rolls and cut them to the desired size. This compatibility will save you a lot in the long run. Check this information carefully in the product description.
Our Selection
The creative workshop and daily management are full of innovative solutions for DIY enthusiasts and the organized alike. This week, we are zooming in on three very different kits that promise to transform a passion or a simple task into a pleasant experience. From artistic resin to customizable stress balls, to food preservation, here is our selection deciphered through the lens of specifications and community feedback.
Comparison Table
| Product | Type of Use | Included Material | Ease of Use | Community Highlights |
|---|---|---|---|---|
| VidaRosa Epoxy Resin Starter Kit | Artistic / Creation (jewelry, decor) | Complete kit (resin, hardener, pigments, molds, accessories) | 1:1 Ratio, 40 min work time | Excellent starter kit, versatile |
| Vacuum Stress Ball Making Kit | Sensory / Relaxation | 10 empty balls, filling tool | Simple custom creation | Durable material, effective stress relief |
| Raycial Food Vacuum Sealer | Culinary / Preservation | Machine, bags, knife, hose | Single button, removable tray | Multi-function, significant time saver |
VidaRosa Epoxy Resin Starter Kit

This kit promises to open the doors to the captivating world of epoxy resin for absolute beginners. On paper, the specs announce a very complete pack with 600 ml of resin (with a practical 1:1 mixing ratio), pigments, glitter, molds and all the necessary small tools to get started. Versatility is clearly highlighted for projects ranging from jewelry to coasters.
According to user feedback, it is indeed an excellent entry point. The community notes that the kit is well designed for a first experience, eliminating the tedious search for basic accessories. The approximately 40-minute work time is considered comfortable for beginners. However, reviews also highlight some concrete limitations. The quality of the molds is sometimes described as average, with risks of blurred detail on the final pieces. Some users also mention sensitivity to air bubbles, requiring meticulous application or investment in a complementary tool like a heat gun. Finally, as with any resin, the full curing time (24h) requires patience and a dust-free space. So it's an ideal kit to explore the discipline without breaking the bank, but you may need to rely on better quality molds and pigments for more ambitious projects.
Vacuum Stress Ball Making Kit

Here, we leave the artistic domain for that of sensory well-being. This kit proposes creating your own stress balls by filling them with the material of your choice (sand, beads, glitter...). The specifications highlight the silicone material, described as stretchy and tear-resistant, designed for intensive use.
The community of users, often parents or people looking for tools to manage stress or anxiety, validates several aspects. The customizable aspect is a real plus, allowing the texture (noisy or soft) and appearance to be adapted to preference. Feedback generally confirms the sturdiness of the balls once filled and sealed. The manufacturing process is considered simple and accessible to children (from age 12 according to the manufacturer), and can even become a creative activity in itself. However, reviews caution on a few points. The filling and sealing phase can be tricky and messy if not done carefully. Some note that the provided sealing tool can lack long-term reliability, with risks of leaks if the seal isn't perfect. In short, it's a fun and effective product for a personalized result, but one that requires a bit of care during assembly to ensure its durability.
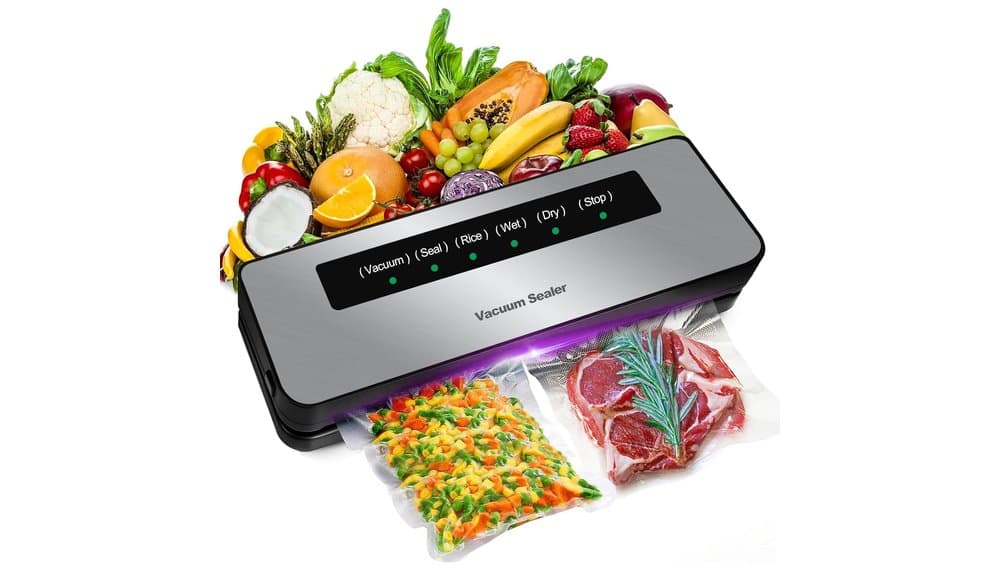
Raycial Food Vacuum Sealer

Moving on to a more technical piece of equipment for the kitchen. The Raycial Food Vacuum Sealer presents itself as a 7-in-1 machine (dry, moist, manual sealing functions, etc.) with a power of 90 kPa. Its main argument is the ease of use thanks to a one-button system and a removable drip tray, a practical detail for maintenance.
Analysis of customer reviews reveals a machine generally very appreciated for domestic use. Users praise its versatility and effectiveness for extending the shelf life of food, preparing quick marinades, or packaging products for freezing. The presence of a built-in cutter and pre-cut bags in the starter kit is also seen as a real asset. The continuous sealing function is practical for preparing several bags in a row. However, the community also notes its limitations. The power, although sufficient for most common tasks, can be a bit limited for sealing large bags or with very moist foods, sometimes requiring two passes. Some reviews mention significant noise during operation. Finally, while the starter kit is complete, regular use implies purchasing compatible rolls of bags, which represents a recurring cost. So it's a robust and functional appliance that greatly simplifies preservation, provided you have regular use to justify its acquisition.
The Container Question: Bags, Rolls, and Boxes
The choice of container is almost as important as the machine itself. You spend time cooking a fish to perfection, but if the bag punctures or lets air in, everything is ruined. This is the element that will be in direct contact with your food, so don't cut corners here.
Pre-cut Bags or Rolls: The Convenience vs. Economy Dilemma
A starter kit often includes a box of bags in different sizes. It's perfect for initial tests. But very quickly, you'll realize it's not very flexible and is expensive for regular use.
- Pre-cut bags are convenient for a single portion: one steak, two chicken fillets. You take one, open it, slide the food in, and you're done. But for a large cut of meat or vegetables in large quantities, you might run out of space. And they often cost more than 50 cents each.
- Rolls, on the other hand, are your ally for true freedom. You cut the exact length you need. A 20 cm piece from a 30 cm wide roll costs you about 15-20 cents. The difference over a year is huge. For your best beginner sous vide kit, check that your sealer is compatible with standard rolls (this is often the case). Invest in a food-grade roll, with a thickness of at least 15 microns to avoid tearing.
Material Quality: What Really Matters
Don't just look at the price. Look at the composition. Bags must be BPA-free and designed for sous vide cooking. This means they can withstand temperatures of at least 90°C, or even 100°C, without deforming or releasing substances. A low-quality bag can become brittle with heat or leave a plastic taste. Test one with hot water before cooking a precious food item.
Another crucial point: the inner surface must be smooth for a perfect seal. Avoid textured or patterned bags, as they can compromise the airtightness of the seal.
Rigid Vacuum Boxes: The Forgotten Alternative
They are rarely in the basic kit, but they deserve your attention. These are hard plastic boxes with a lid equipped with a valve and a manual pump (sometimes included). Their advantage is immense for two specific uses:
- Already cooked foods or liquid leftovers: you put your stew or soup in the box, you suck out the air with the small pump. Zero risk of leakage, and you can reheat directly in it in the microwave or in a water bath.
- Fragile foods: strawberries, raspberries, a cake... A bag could crush them during vacuum sealing. The box protects them while expelling the air.
It's not essential to start, but if you like preparing sauces, purees, or storing fruit, it's a very smart investment that perfectly complements bags. A good one-liter box costs around twenty euros.
Do You Really Need a Dedicated Tank for Sous-Vide Cooking?

It's the big question. You have your circulator, your sealer, your bags... and now, you find yourself looking at your biggest pot thinking: "Will this do the trick?" The answer is yes, but with very concrete limits.
Your Saucepan: The Ultimate Beginner's Test
For your first experiments, using a large saucepan or stockpot you already own is perfectly valid. It's even what I advise you to do. This allows you to check if you like the technique without any additional cost. There are just three rules to follow:
- Size: Your saucepan must be tall enough to completely cover the circulator, with a few centimeters to spare. A minimum height of 20 cm is a good starting point.
- Heat loss: The thin walls of a standard saucepan let heat escape. For long cooks (over 4-6 hours) or precise temperature cooking (like an egg at 63°C), you will push your circulator to its limit and potentially wear out its heating element prematurely. You will also see more evaporation.
- The improvised lid: Without a lid, evaporation is massive, especially at 85°C for vegetables. Use plastic wrap, or cut a lid from a rigid plastic chip bag. It's ugly, but it works.
When a Dedicated Tank Becomes Necessary
Switching to a tank becomes almost mandatory as soon as you cook regularly or for several people. Here is when your saucepan will tell you "stop".
- For large cuts: Imagine wanting to cook a 3 kg lamb shoulder or 4 whole chickens for a family meal. In a standard pot, it's impossible. A 12 to 16 liter tank opens up these possibilities.
- For long cooks: A 48-hour bourguignon? In a saucepan, you'll have to add water every 8 hours. A well-insulated tank with a proper lid can last 24 hours without any refill. The difference in peace of mind is colossal.
- For thermal stability: A good polycarbonate tank (the widespread cambro type) is an excellent insulator. It maintains the water temperature constant with less effort from the circulator, which improves its accuracy and lifespan.
The Characteristics of a Good Tank
If you decide to invest, don't buy just anything. Here is what justifies the price (generally between €40 and €80):
- The cuttable lid: This is the main asset. It is designed for you to cut a hole perfectly adapted to the diameter of your circulator. This limits evaporation to almost nothing and keeps the heat inside. For a better beginner sous-vide kit, this is an upgrade that changes everything.
- Thick bottom and walls: For thermal and acoustic insulation. A thin bottom transmits the vibrations of the circulator to your countertop, which can be noisy at night.
- Stability: A wide, non-slip base is essential when handling 15 liters of hot water near expensive food. A tipping tank is a potential accident.
My opinion? Start with your saucepan. Do 5-6 cooks. If you're hooked and you're churning out salmon fillets and chicken breasts one after another, then yes, the dedicated tank is the logical next investment. It transforms the experience from comfortable to truly professional.
Balance Your Spending Between the Essential and the Superfluous
It's the classic trap: you start with a tight budget and end up considering purchases that double the bill. For a better beginner sous vide kit, the key is to distinguish what will truly improve your results and your enjoyment from what is just a gimmick or completely useless.
The Absolute Essentials (Don't Start Without These)
This list is non-negotiable. If your budget is really tight, focus on this and ignore the rest for now.
- A Reliable Immersion Circulator: Forget ±0.1°C precision to start. Look for one with an advertised precision of ±0.5°C or better and sufficient circulation power (at least 800W is a good benchmark). It's the heart of the system.
- A Cooking Container: As discussed, your large pot works perfectly well. Zero additional euros spent.
- A Vacuum Sealer and Its Bags: Prioritize an entry-level model with a moist sealing function. It's the most used tool after the circulator itself. Compatible bags (not necessarily brand-name) on rolls are much cheaper in the long run.
The "Nice to Haves" (Buy Them Only If...)
These purchases are not necessary for the first cook but become relevant very quickly.
- A Dedicated Container with Lid: Buy it only if you regularly do cooks longer than 6 hours or for more than 4 people. Otherwise, your pot holds up fine.
- A Kitchen Torch: Frankly, it's the most effective finishing accessory. But before investing 50-80€ in a good model, test with a very hot cast iron skillet. If you are satisfied with the crust you get in the pan, the torch can wait.
- A Circulator Mounting Clip: Very convenient, but a piece of wood or a sturdy storage case can serve as a temporary stand. Don't pay 30€ for a piece of plastic before you're sure you're sticking with the technique.
The Superfluous (Ignore These Traps for Now)
You see them everywhere, but for a beginner, this is money thrown out the window.
- "All-in-One Kits" with Integrated Container: They are often expensive, bulky, and if one component breaks, the whole thing is trash. Modularity (separate circulator + separate container) is much smarter and more economical in the long term.
- Ultra-Precise Connected Features: A basic Bluetooth app to start a cook from the sofa, maybe. But ultra-specific cooking programs and online recipe libraries? You won't use them for a long time. Focus first on manually mastering time and temperature.
- Specialized Accessories (racks, holders): Ordinary kitchen tongs work perfectly well for handling bags. Clothespins to clip bags to the edge of the pot do the job. Don't clutter your drawers before you've identified a real need.
My advice? Set a maximum budget. Say 250€ for a complete better beginner sous vide kit. Allocate 150€ to the circulator and the sealer. With the remaining 100€, make your first bag purchases and, only after several successful cooks, consider the container or the torch. This way you'll avoid the frustration of having spent money on a gadget that gathers dust.
Conclusion
You are now ready to choose your first sous vide kit with confidence.
Remember: start with the essentials. A precise circulator, a reliable sealer, and your own utensils. The rest will come with practice.
The key is to get started. Once you taste your first perfectly juicy chicken or your vegetables with the ideal texture, you will understand all the benefits.
Happy cooking
Frequently Asked Questions
What is the best sous vide kit for beginners?
A good beginner kit includes three essential elements: a precise cooking probe with ±0.5°C accuracy, a sous vide sealer with a "moist" mode for liquid foods, and heat-resistant bags. Avoid kits that do not offer at least the probe and the sealer.
Which sous vide sealer should a beginner choose?
For home use, prioritize an external suction sealer with a mandatory "moist" mode for marinades, and aim for a suction power between 70 and 90 kPa. Make sure it is compatible with standard rolls of bags to save money in the long run.
Is it necessary to buy a dedicated container for sous vide cooking?
No, you can perfectly start with a large pot or stockpot already in your kitchen. A dedicated container becomes necessary only for very long cooks (more than 6 hours) or very large cuts of meat, as it limits evaporation and stabilizes the temperature.
Which bags to use for sous vide cooking?
It is essential to use BPA-free bags designed for sous vide cooking, resistant to temperatures of at least 90°C. For more flexibility and economy, prioritize buying rolls compatible with your machine that you can cut to the desired size.
What is the budget for a first sous vide kit?
Focus the majority of your budget (around €150) on a precise circulator and a reliable sealer, using your existing kitchen utensils as a container. This way, you can have a complete and functional kit for about €250, with accessories like a specific container being added later.
What temperature accuracy is necessary to start?
An accuracy of ±0.5°C is an excellent starting point for a beginner, as it is largely sufficient to perfectly cook most meats, fish, and vegetables. This stability ensures even cooking without overcooking the food.
100% free and independent — All our articles are written independently, without any sponsorship. We may earn a commission on purchases made through our links, at no extra cost to you.
Guides you might like

Bell Jar Vacuum Sealer Buying Guide
Upgrade to a chamber vacuum sealer for professional sous-vide results at home. Perfect for liquids and flawless, long-lasting seals.

Best Vacuum Bags
Choose the right vacuum sealer bags for perfect results. Learn key specs like heat resistance, thickness, and barriers to avoid culinary disasters.

Cast Iron Pan Buying Guide
Select the perfect cast iron skillet: understand natural for searing vs enameled for easy care to transform your cooking results.
Articles you might like

Lipavi C10 11.3 Liter Vacuum Container Review & Test
LIPAVI C10 sous-vide container review: analyzing its energy efficiency, thermal stability & ease of use for precision cooking.
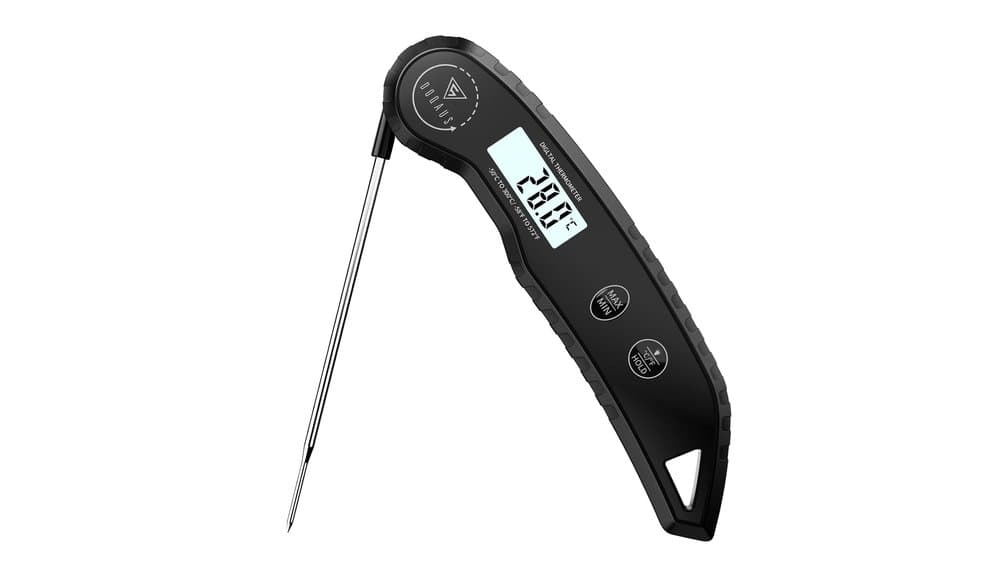
DOQAUS Instant Read Dial Thermometer Review
Master temperature for perfect cooking. Dial thermometer for instant, reliable readings on steak, syrup, ovens. Essential precision tool.
Dictien CF-001A 6-in-1 Sous Vide Machine Review
Ensure perfect sous-vide with the versatile Dictien CF-001A 6-in-1 vacuum sealer for both dry and moist foods. A comprehensive review.